
Efficiency in eLearning: Master Slides in Adobe Captivate 5 (Part I)
¡Bienvenidos, Litmos community! Those of you tasked with converting your organization’s content into rapid eLearning — we’re looking at you.

Previous posts have looked at cross-functionality between Microsoft PowerPoint and Adobe Captivate. The relationship between PowerPoint and eLearning is like an up-and-down romance. PowerPoint brings some cool stuff to the table, but can often gain the upper hand and stifle eLearning creativity. Although importing existing PowerPoint into Captivate is a great way to get some rapid output into your LMS, the danger exists that your learners will see nothing but mediocre PowerPoint converted to Flash.
Round-trip editing and some re-engineering (in accordance with your eLearning philosophy) will help, but ultimately you may want to build from scratch within a tool such as Captivate or Articulate.
Working from scratch is daunting, but current rapid eLearning tools allow you to re-use objects and create templates. We’re not going to create detailed feature tutorials (there are plenty out there). Our goal is to emphasize specific features that scale well and lead to process efficiencies. That sounds dull—we’ll show you things that allow you to get shiny eLearning up and running.
The specter of PowerPoint looms, in the sense that there’s often an analogous function baked into an eLearning tool. One of the strengths of PowerPoint is its way of handling master slides. The slide master is an element of the design template that stores information about the template, including font styles, background design, and color schemes.
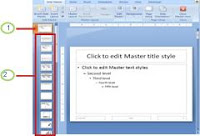
If you’ve never done it, you can create multiple master slides in PowerPoint, which is a huge time-saver. Create and name master slides (like an intro slide, a body slide, a recap slide, etc.) with your design elements. Insert new slides based on the desired layout, add text an images, and boom—quick presentation.
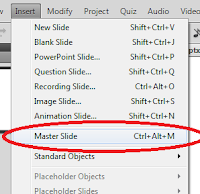
The point is that Adobe Captivate 5 has an excellent master slide function as well. You can work with masters much as you would in PowerPoint, but with features slanted towards your eLearning philosophy. Simply create a new master slide from the Insert menu, and you can begin to customize re-usable slides for different parts of your course. You can label the slide (Intro, Body, Summary, etc.) and add elements: text captions, rollover captions, rollover images, highlight boxes, text animations, widgets, images, animations, and even video (as FLV or FLV4 files).
Master slides are a huge time-saver. In Part II, we’ll detail a quick process for creating and using master slides in a Captivate 5 project.
Cheers!